出力設定

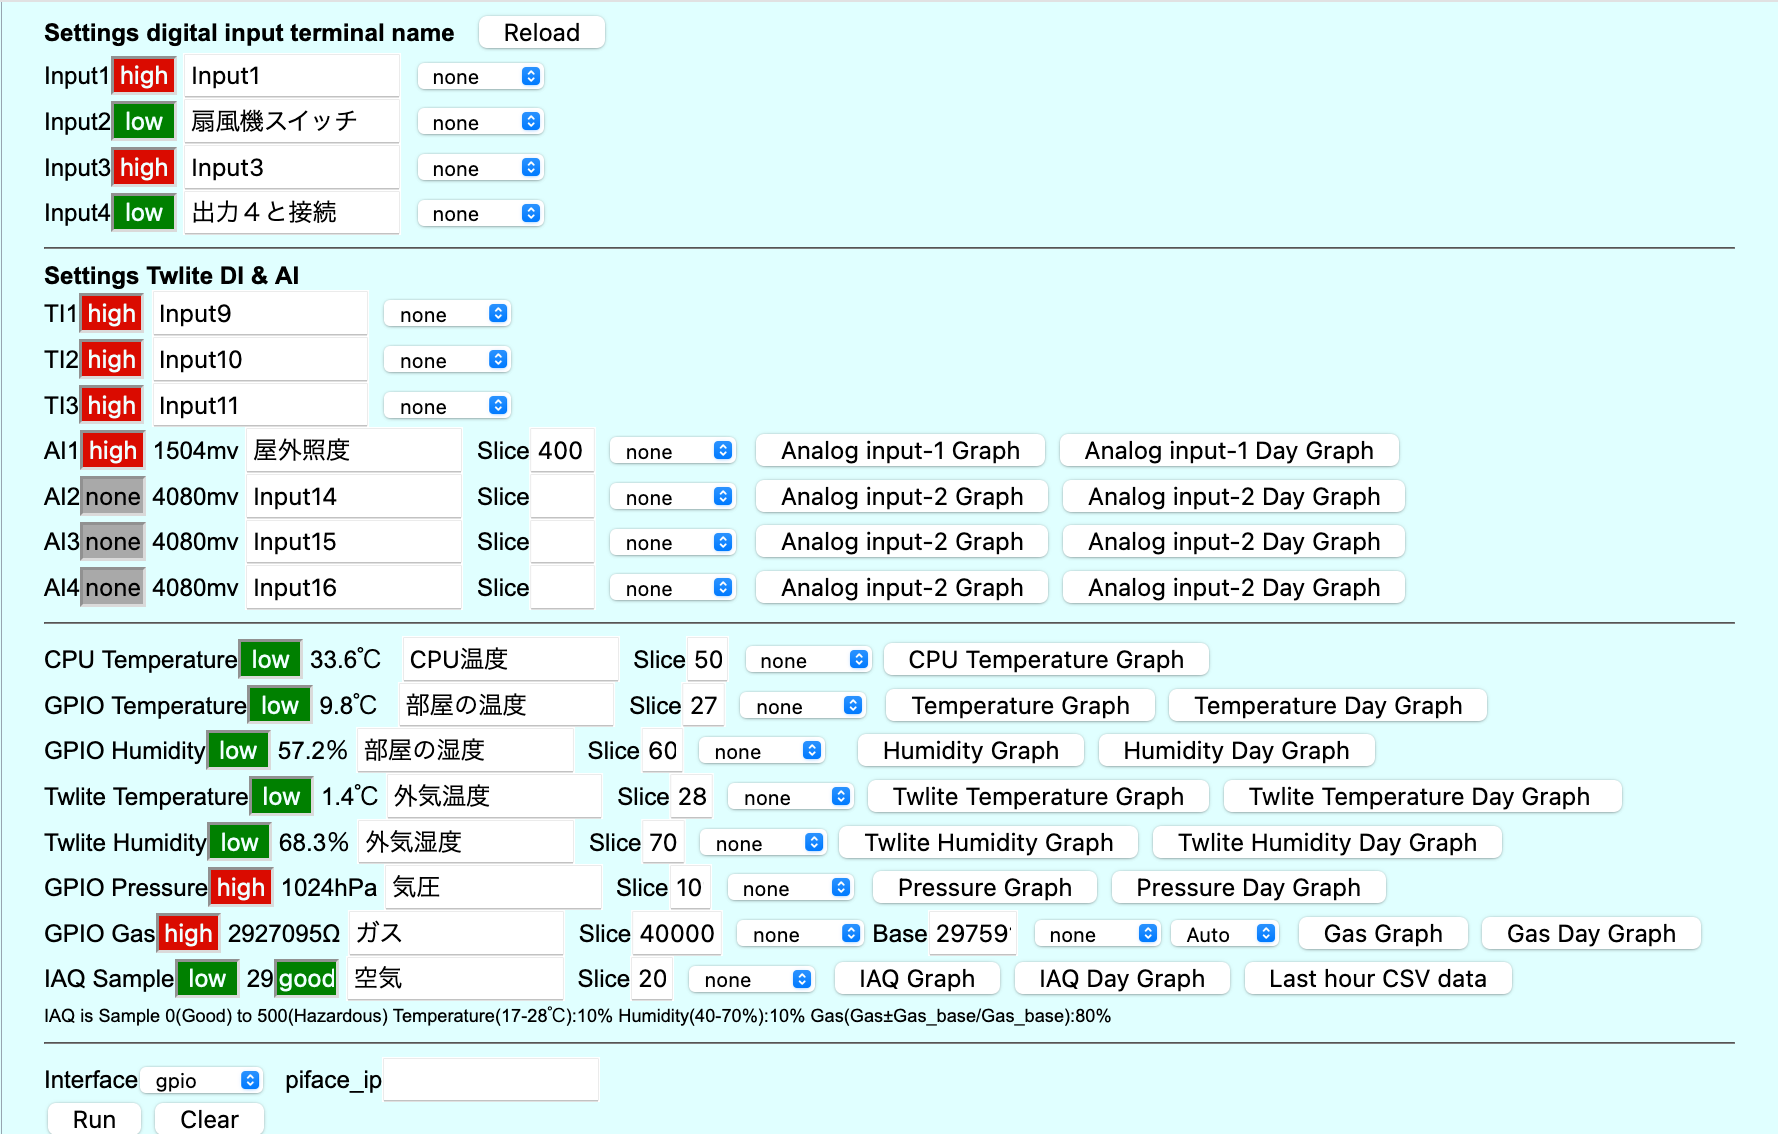
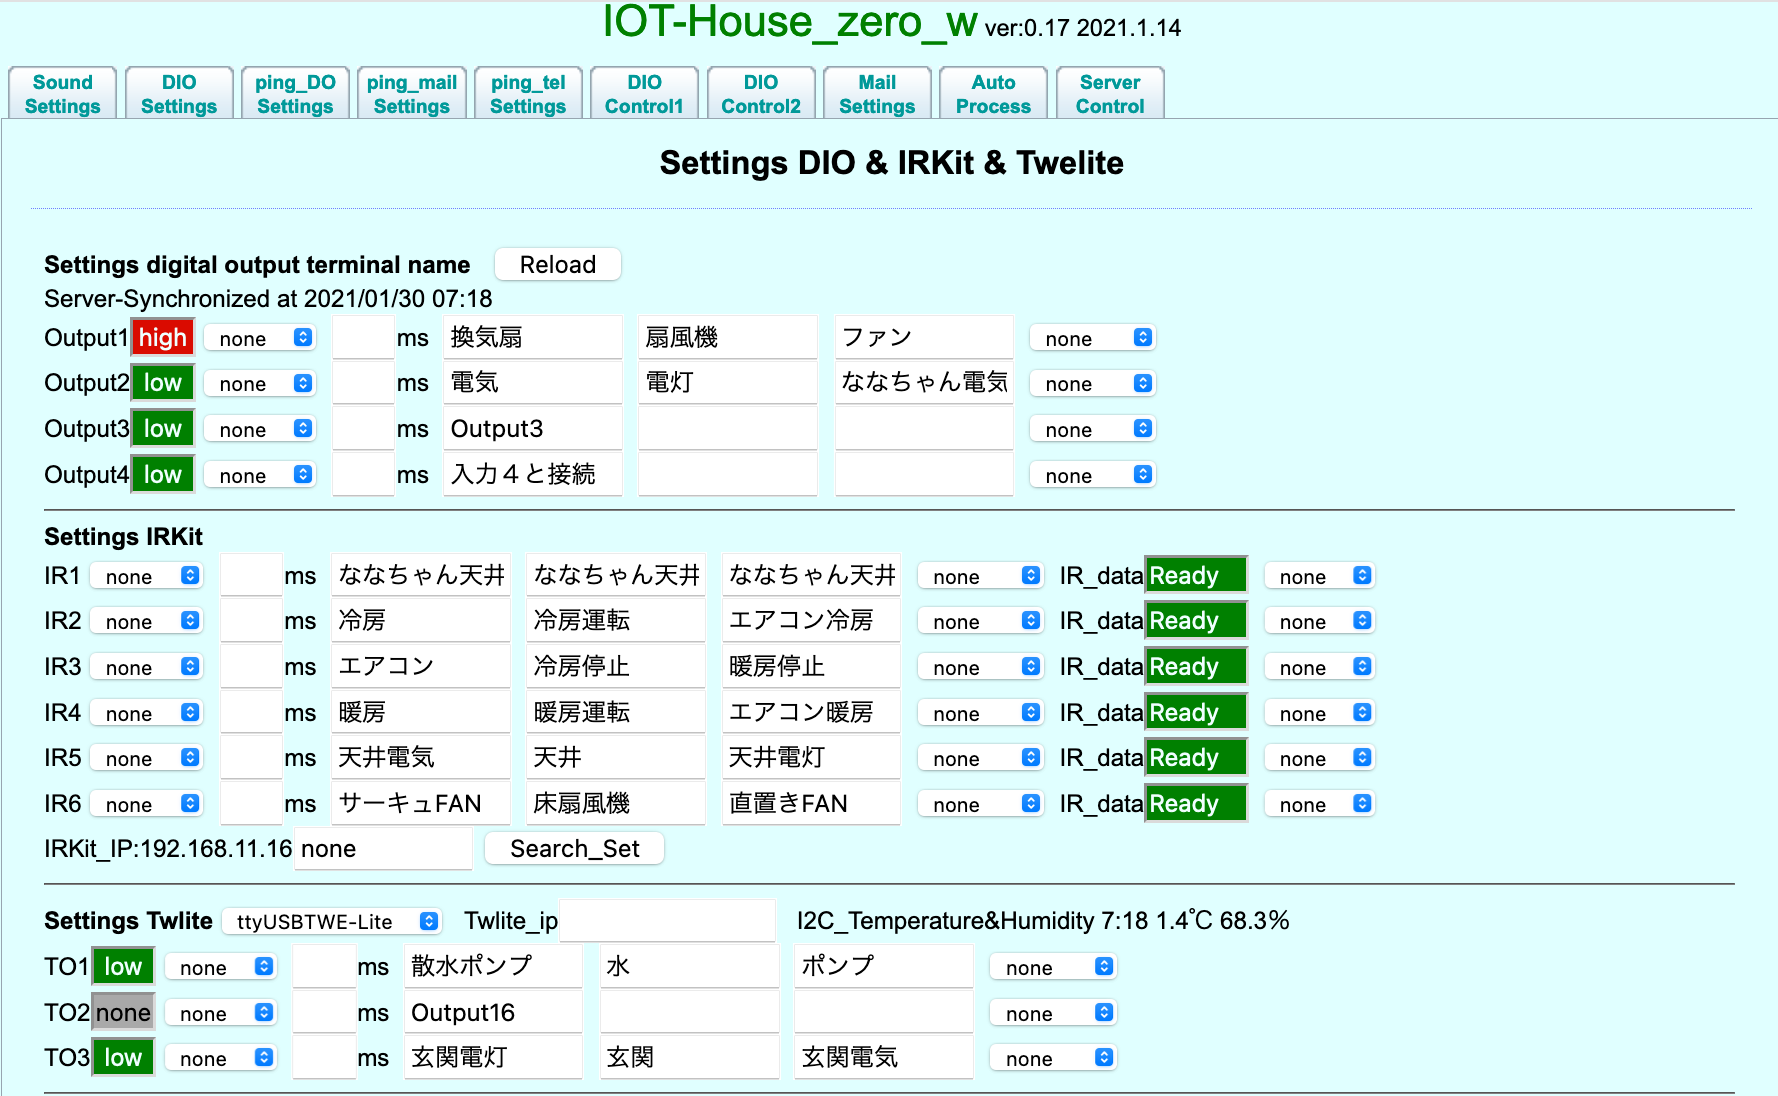
  • 出力名設定
    • 出力に命名します、設定した名前は他設定で分かり易くするためです
output_settings

インストール

実践IOTハウス

  • 下記URLよりダウンロードします
    https://ja.osdn.net/projects/pepolinux/releases/p15935
  • 下記容量のflashメモリを用意して下さい
    1
    2
    3
    4
    5
    6
    7
    8
    9
    10
    11
    12
    13
    # fdisk /dev/mmcblk0

    Welcome to fdisk (util-linux 2.29.2).
    Changes will remain in memory only, until you decide to write them.
    Be careful before using the write command.

    Command (m for help): p
    Disk /dev/mmcblk0: 7.3 GiB, 7820279808 bytes, 15273984 sectors
    Units: sectors of 1 * 512 = 512 bytes
    Sector size (logical/physical): 512 bytes / 512 bytes
    I/O size (minimum/optimal): 512 bytes / 512 bytes
    Disklabel type: dos
    Disk identifier: 0x15ae16d5
  • ダウンロードしたIOT-House_zero_w_xx.7zを展開、IOT-House_zero_w_xx.imgをflashメモリへ書き込みます
  • IOT-House_zero_w_xx.imgを書き込んだflashメモリ装着します
  • Raspberry Pi電源を投入します、ACT LEDの点滅が落ち着くまで3分以上待って電源オフします
  • flashメモリを取り出し、下記/boot/iothouse_config.txtをテキストエディタで例に習って編集します
  • MAC AddressフィルタリングしているWifi環境では以下の表示されているアドレスを登録、フィルタリングを有効にします
    ※ # Wireless address of this machine –> b8:27:eb:XX:XX:XX
  • USB接続eth0で認識出来るデバイスを使う場合はSSIDとKEYをコメントアウトします
    1
    2
    3
    4
    5
    6
    7
    8
    9
    10
    11
    12
    13
    14
    15
    16
    17
    18
    19
    20
    21
    22
    23
    24
    25
    # Please describe the setting for IOTHouse below
    # Wireless address of this machine --> b8:27:eb:XX:XX:XX
    # The following is an example of a static ip address
    #HOST_NAME=iot000
    #SSID=iothouse999
    #KEY=999iothouse
    #IP_ADDRESS=192.168.1.200/24
    #GATE_WAY=192.168.1.1
    #NAME_SERVER=8.8.8.8
    # end of an example

    # The following is an example of dynamic ip address
    # Access is iot000.local
    #HOST_NAME=iot000
    #SSID=iothouse999
    #KEY=999iothouse
    #IP_ADDRESS=dhcp
    # end of an example

    HOST_NAME=
    SSID=
    KEY=
    IP_ADDRESS=
    GATE_WAY=
    NAME_SERVER=
  • /boot/iothouse_config.txtの編集が終わったflashメモリを装着し、Raspberry Piを再度電源を投入
  • Webブラウザでhttp://HOST_NAME.localへアクセス、ユーザー名:remote パスワード:hand でログインします
  • sshは ユーザー名:root パスワード:pepolinux です

ハードウェア

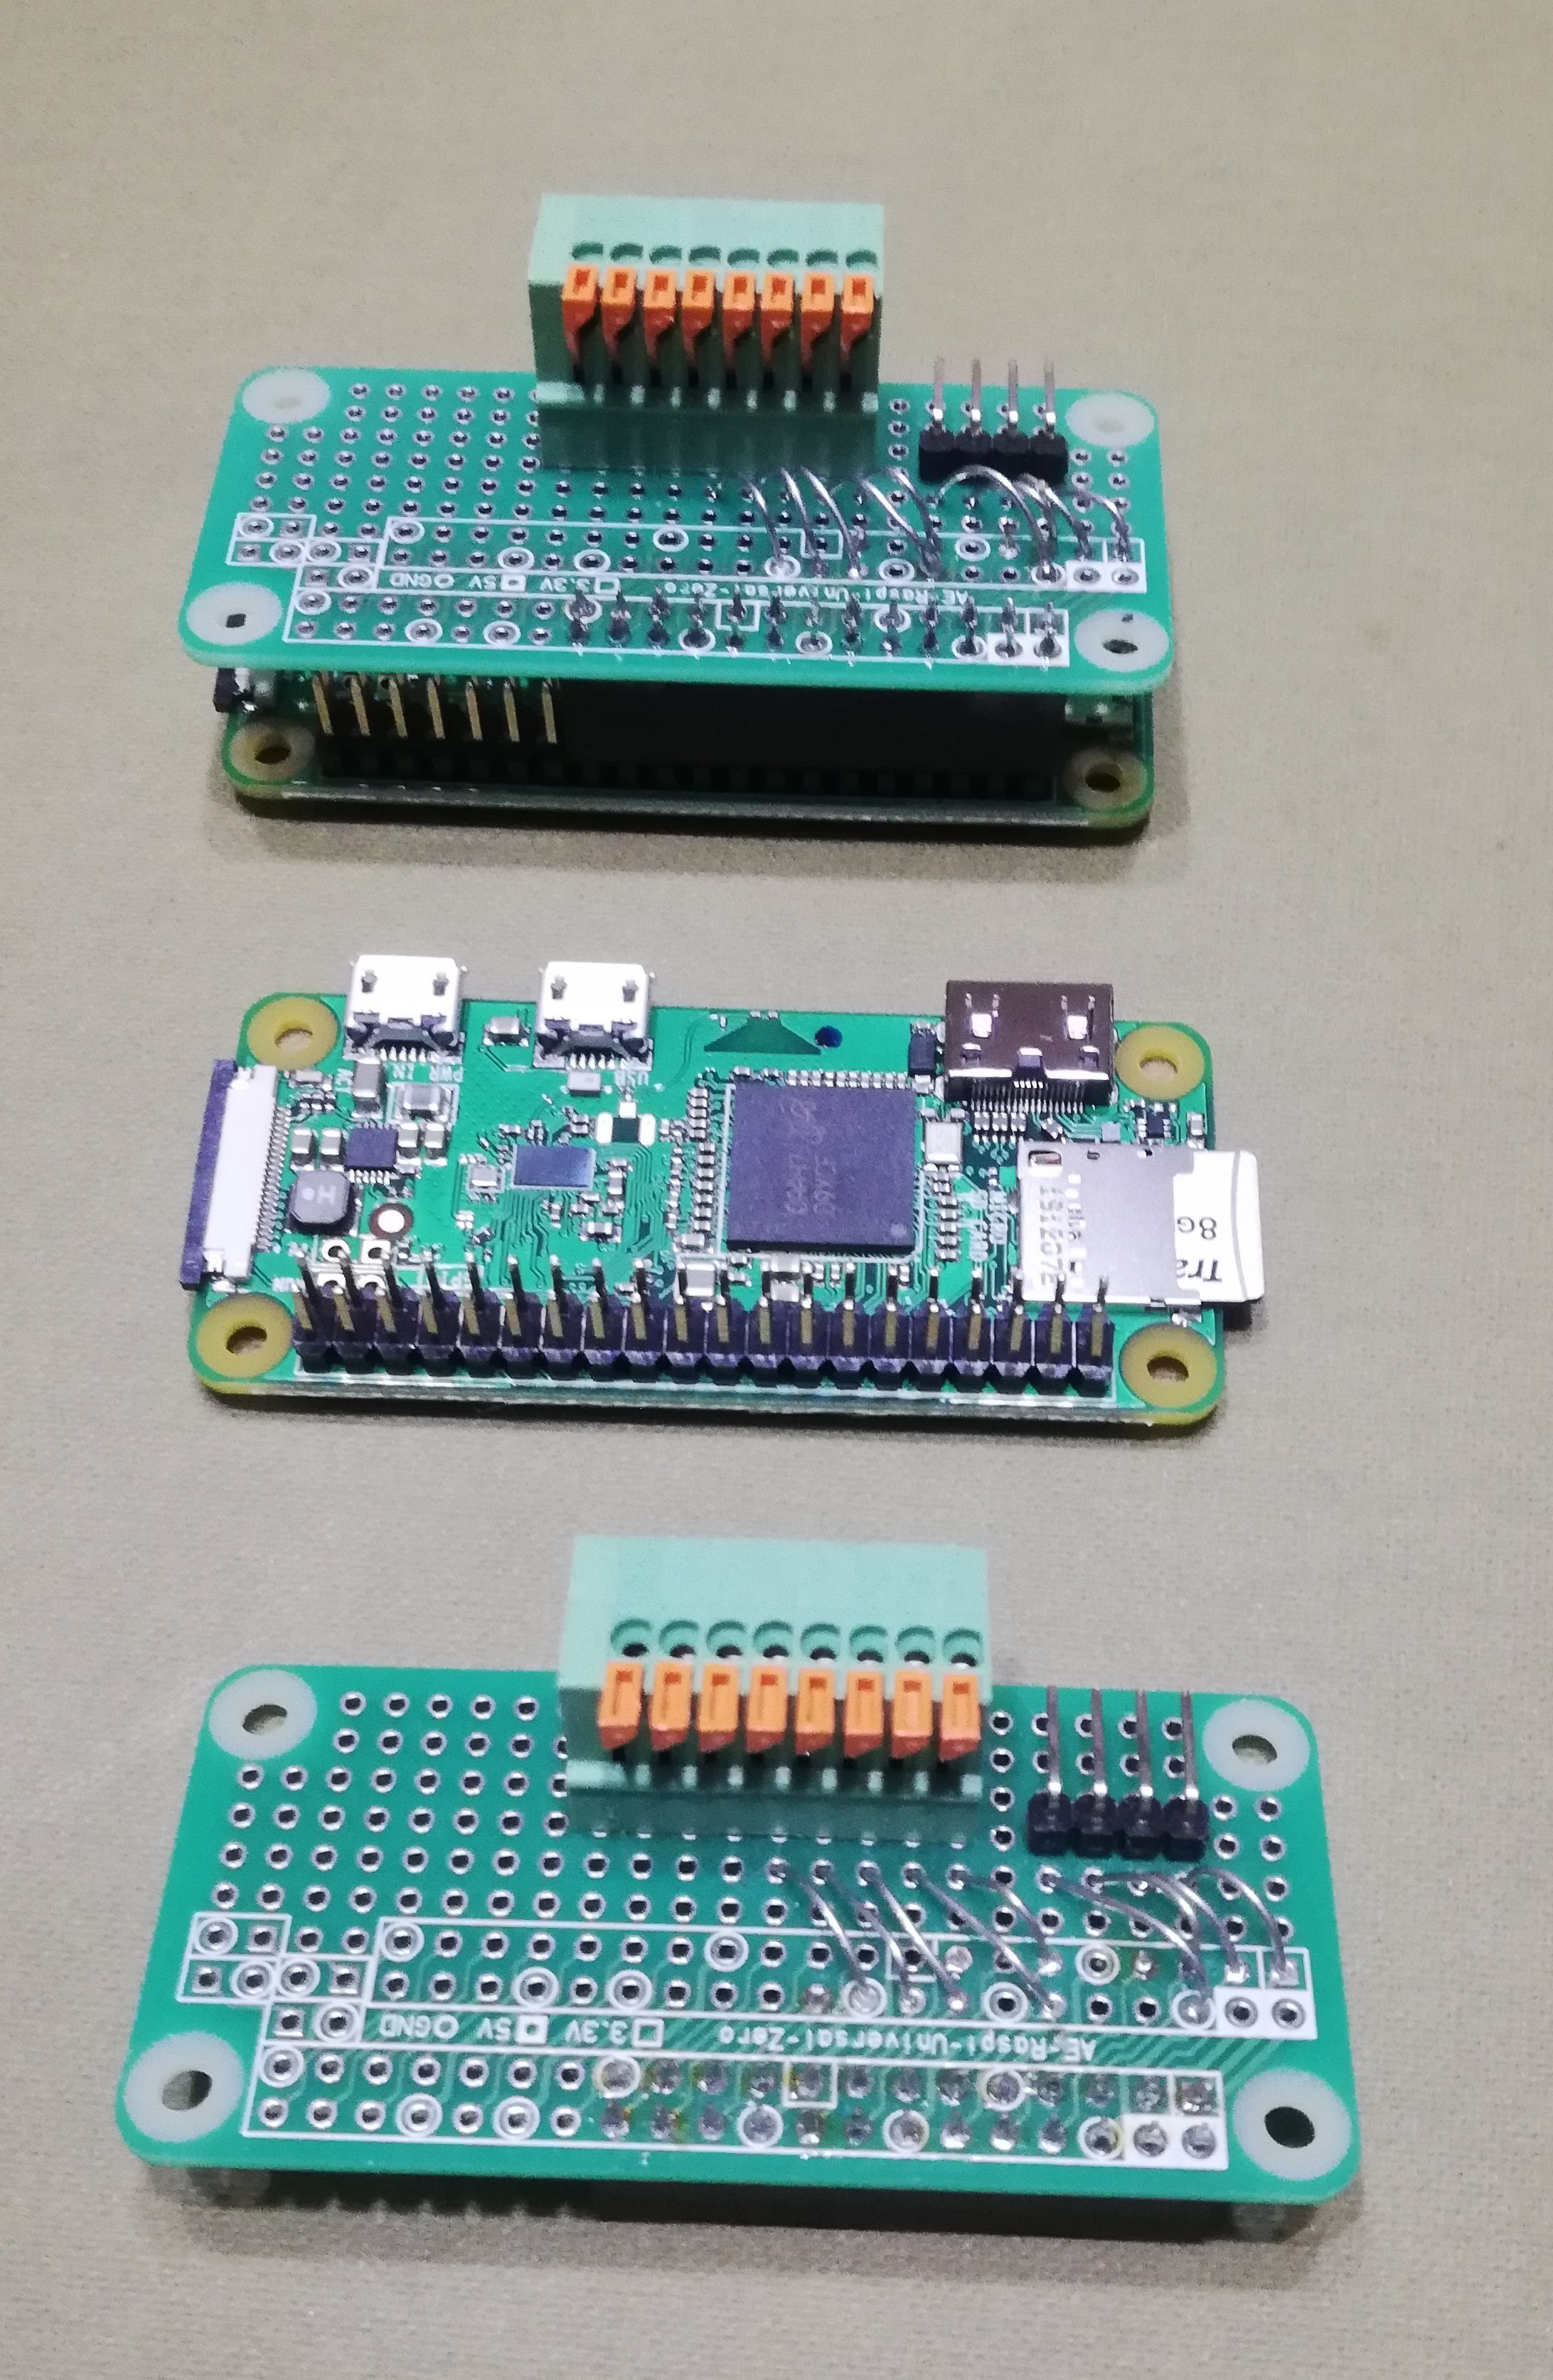
  • Raspberry Pi Zero 自作ボード
    Raspberry Pi Zero hat
  • ソリッドステート・スイッチAC100Vコンセントボックス
    保護のためにAC100Vと直列に接続され、2Aのリセット可能なヒューズが付いています。
    gpioの出力端子で AC100を直接オン/オフする事が出来ます。
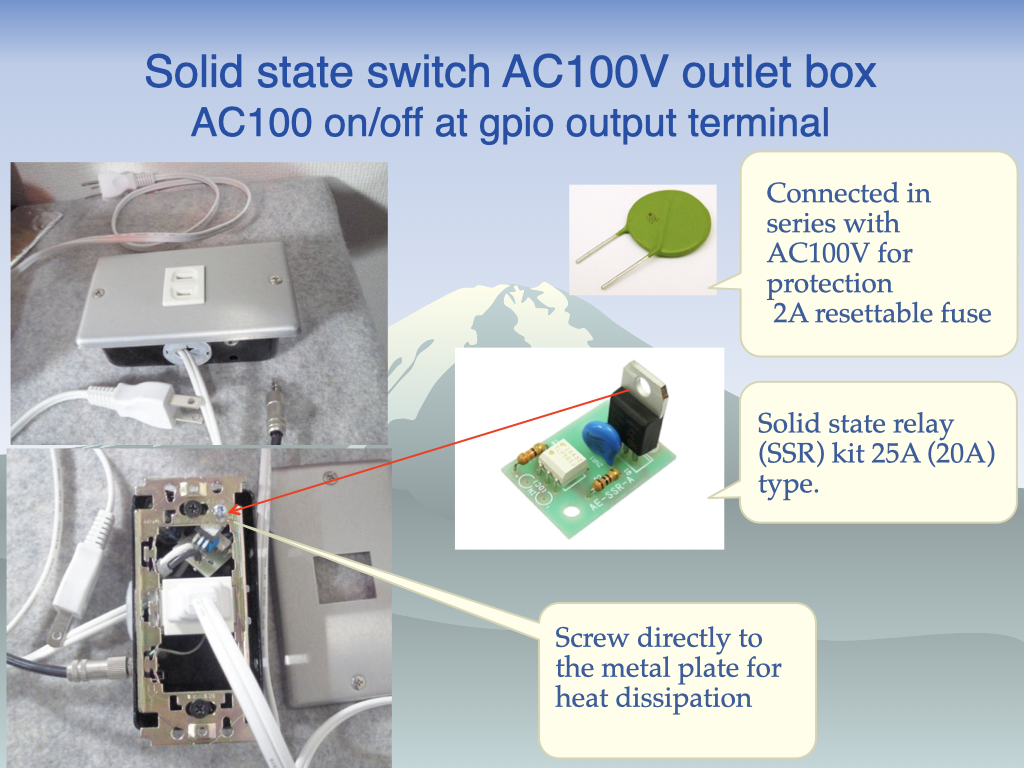
    solide_state_concent_box
  • 2階出窓に設置されたRaspberryPi Zeroは、屋外監視カメラ、部屋の温度、湿度、空気質を監視、gpiotwelite dipの出力で3か所の換気扇を制御します。
  • 屋外に設置された外部環境監視用ラズパイのドップラーセンサーでモジュールカメラを起動、日中は動画、夜は写真をメールする2F_rasp